Procreate

Procreate Brushes Provide a Plethora of Graphic Design Possibilities

Procreate digital brushes and Apple Pencil are key tools

What is Procreate? This powerful $USD10 illustration-lettering-drawing app generates high-resolution, multilayered raster images. First made for the iPad Pro for creatives, (thus, “Procreate”), today the app works on any iPad that can pair with an Apple Pencil.

In Procreate, you draw with a digital “brush.” Some brushes are strokes that mimic those of physical drawing and painting tools; others are “stamps” or shapes. Only Apple Pencil Generations 1 and 2 provide both tilt and pressure sensitivity for full stroke variability.

Procreate comes with 100+ brushes installed. If you need more (or are a “brush junkie”), you can tailor-make brushes or import ready-made free and paid brushes. You can find thousands of brushes with a little Internet sleuthing. Import brushes or brush sets via the Procreate brush panel.

I follow Procreate artists and graphic design blogs and often find new brushes. I purchase some and get others free. Here are a dozen of my favorite free and paid Procreate brush sites, in no special order:

Most all of these providers also offer free Procreate tutorials, color palettes, and more; Procreate Folio offers a discussion group and other resources, including a complete Procreate manual.

Watercolor drawing of hamburger on a red and white checkered tablecloth
Cafe Series, Hamburger | Procreate Watercolor and Pattern Brushes
Watercolor Cactus | Procreate inking and watercolor brushes

Procreate brush management tips

If you download everything that catches your eye, you will reach “Brush Overload.” So, consider these brush management tips to make it easier to use and find your Procreate brushes:

  1. Keep only the brushes you need active in your Brush Library. Experiment with new brushes you download; you will find lots you like and lots you don’t need.
  2. Keep your Brush Library organized; Export unused brush sets to your iCloud, Dropbox, Google Drive, or other file backup locations.
  3. Create a Favorites folder. Copy the brushes you use the most to that folder.
  4. Set a Brush Restore Point. Explore brush settings, but remember to back up settings before you change them.
  5. Make your own brushes and brush sets if you don’t find what you need in the marketplace. Export (Share) them for safekeeping so you can use them for another project.

I use Procreate almost daily in my design workflow; this little $USD10 app—now in its fifth generation—has amazing capabilities. Procreate provides a plethora of possibilities with an abundance of ready-made brushes and the ability to tailor-make your own. Experiment with different brushes, try different drawing styles, and find the ones that work the best for you. Keep your brushes organized, and copy your favorites to an easy-to-find folder.

Explore the possibilities, and happy drawing!

Posted by Jill B Gilbert in Art, Best Practices, Design, Graphics, Illustration

When the dog bites, when the bee stings…

Illustration of a bee flying near flowers, with the title Bee Calm

I had just returned from walking our dog, Maggie, which happens three or four times each day. I unclipped her leash to let her run in the yard and noticed a stray leaf that needed to be picked up. As I bent down, a bee or wasp stung me on the face. I had a fat lip in seconds and calmly drove myself to the ER. 

I drew this “BEE CALM” illustration later that day to remember to remain calm during emergencies. I used Procreate on my iPad Air with several stamp and texture brushes. A nice memory of a scary situation! By the way, I never found the insect responsible…

Posted by Jill B Gilbert in Art, Graphics, Illustration

Watercolor “Food for Thought” Series

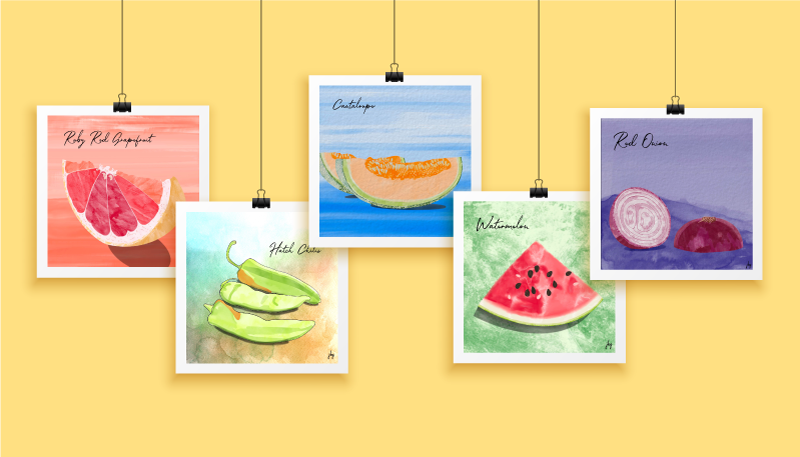
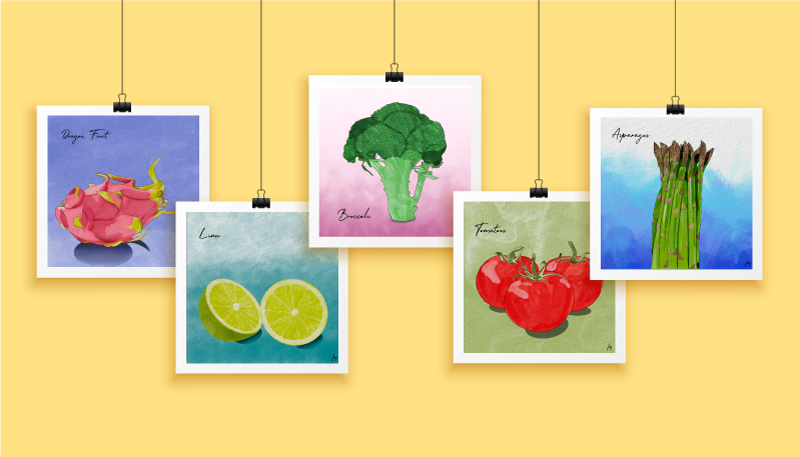
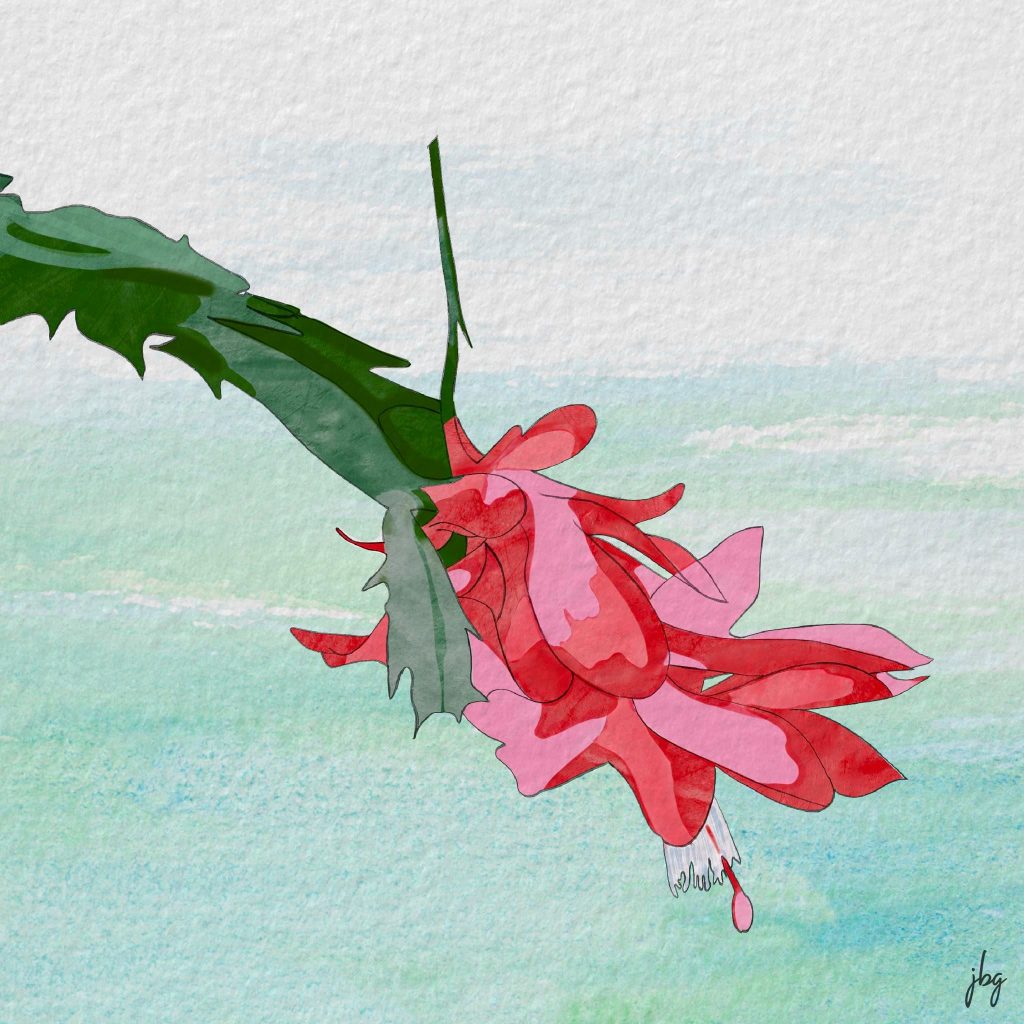
I completed a few watercolor tutorials by Every-Tuesday and got hooked. After the tutorials, I found a handful of inkers and watercolor brushes I liked and started drawing colorful fruits and vegetables. I found it engaging.

Now, the Watercolor Food for Thought series has 30+ images! You can enjoy some of these below.

Selected watercolor drawings from the Food for Thought series by Jill B Gilbert. Ruby Red Grapefruit, Hatch Chilis, Cantaloupe, Watermelon, and Red Onion.
Food for Thought Series | Selected Watercolor Drawings
Selected watercolor drawings from the Food for Thought series by Jill B Gilbert. Dragon Fruit, Lime, Broccoli, Tomatoes, Asparagus
Food for Thought Series | Selected Watercolor Drawings, Part 2
Posted by Jill B Gilbert in Art, Color, Illustration

Drawing during the pandemic improves skills measurably

Patience, the Procreate app, and creating something every day improved my drawing and illustration skills.

Last year, my “go-to” hardware was a MacBook Pro, a Wacom drawing tablet, a wireless keyboard and a 25-inch monitor. Late in 2019 I upgraded my iPad and purchased an Apple pencil. I could use the iPad anywhere, rather than be chained to the desk in my studio.

Back to the pandemic… I have worked at home for over 15 years, so staying home a bit more was not too taxing. I wanted to improve my drawing skills, but could not make myself pick up a sketchbook. I remember my drawing teacher told me, “just try drawing something–anything–each day.” So I started creating something on the iPad nearly every day. Birthday cards, abstract illustrations, watercolor drawings, comic-style illustrations, and more. I learned how to use dozens of different types of “brushes,” something I hadn’t explored much in Adobe Photoshop and Illustrator. I created many works from photos–free stock photos and my own photos. My skills grew, week-to-week and month-to-month. 

Do something good. Create something every day.

Jill B Gilbert

I truly improved my drawing and illustration skills during the COVID-19 pandemic. I credit patience, and creating something nearly every day, for much of the improvement. And I credit learning the Procreate app for the rest.

Now I use my sketchbook almost daily. Sometimes I use it at the start of a project. Most days I see where my mind takes me when I start Procreate, and use the sketchbook to take notes and to paste printed versions.

My advice: Do something good. Create something every day.

Posted by Jill B Gilbert in Art, Best Practices, Graphics, Illustration

Procreate for iPad review

Procreate is a Raster (pixel) drawing app with many features not found in other drawing apps available for the iPad.

In 2019, my “go-to” tools for making quick–and detailed–graphics and illustrations were Adobe Illustrator and Adobe Photoshop on my Macbook Pro. My setup included a Wacom drawing tablet, a wireless keyboard, and a large monitor. My iPad was a secondary tool, hardly part of my graphic design workflow. I dabbled in the different Illustrator and Photoshop apps for the iPad, but they seemed awkward. 

Then I traded in my iPad for an iPad Air (3rd Generation) and bought an Apple Pencil. I kept hearing about an app called Procreate, designed for the original iPad Pro and the Apple Pencil. A blog I follow had lots of Procreate tutorials, so invested a small sum of ten dollars (!) and got started. Read on to learn the ins and outs of Procreate.

Pluses

  • You can choose from pre-installed drawing templates, or create your own.
  • You can use pressure sensitivity to change brush behavior and drawing stroke.
  • Layers! Depending upon the drawing size and resolution, you can have up to 40 or more layers.
  • Robust text capabilities and the ability to add typefaces.
  • Preinstalled color palettes.
  • You can create color palettes manually, from an image or a photo, or import palettes created by others.
  • You can export and save color palettes.
  • The shape tool creates “perfect” geometric shapes.
  • Drawing assist allows you to create straight lines, smooth curves, symmetrical illustrations, and more.
  • Create CMYK and RGB documents for print and Web, respectively
  • You can export to several file formats, such as PNG, JPEG, TIFF, layered PSD, and PDF.
  • You can edit and create Procreate brushes and brush sets.
  • Thousands of free and paid Procreate brush sets are available.

Minuses

  • As a Raster app, the drawing size and resolution must be set upfront, according to how you intend to use the illustration.
  • In the current version (5x), you can draw and edit arcs with three or four points, but not “S-curves.”
  • If you are a Typophile or often create illustrations with 20 or more layers, Procreate will crash periodically, even with decent iPad memory–but I have never lost a file!
  • There are so many Procreate brushes available, you may find it hard to limit the number you add; currently, you cannot tag brushes as “favorites.”
  • Cannot lock a color palette; I have accidentally changed color swatches many times.

Conclusion

Procreate offers many features not seen in competitors’ drawing apps. I recommend it as part of a graphic design workflow and use it almost daily. It is a true gem, and well worth the money. 

Posted by Jill B Gilbert in Art, Design, Graphics, Illustration